Welcome to HamHacks!
Homemade Hardware, Hacks and Code.
About HamHacks
Welcome to HamHacks — a digital workshop for tinkerers, makers, and anyone who loves turning a mess of wires into something awesome.
This isn’t just another project dump. Everything here is personally tested and vouched for by me. The hardware works. The code runs. And if I’ve posted it, it’s because I’ve had fun building it — and I think you will too.
Whether you're blinking your first LED or diving into Wi-Fi automation with an ESP32, the goal here is simple: take the headache out of coding and give you more time doing what’s actually fun — building, tweaking, and making cool stuff.
So grab your Pi, crack open that dev board drawer, and let’s get hacking. If it’s in here, I’ve wired it, coded it, and probably fried a few components to get it working. You’re in good hands.
Projects
Where It All Begins… Welcome to Arduino
If you’ve ever wanted to breathe life into wires and code—Arduino is where the magic starts.
Arduino is like the gateway drug to the world of microcontrollers...
🧠 What Is a Microcontroller, Anyway?
Imagine a tiny brain with one job: listen to the world, make decisions, and control stuff...
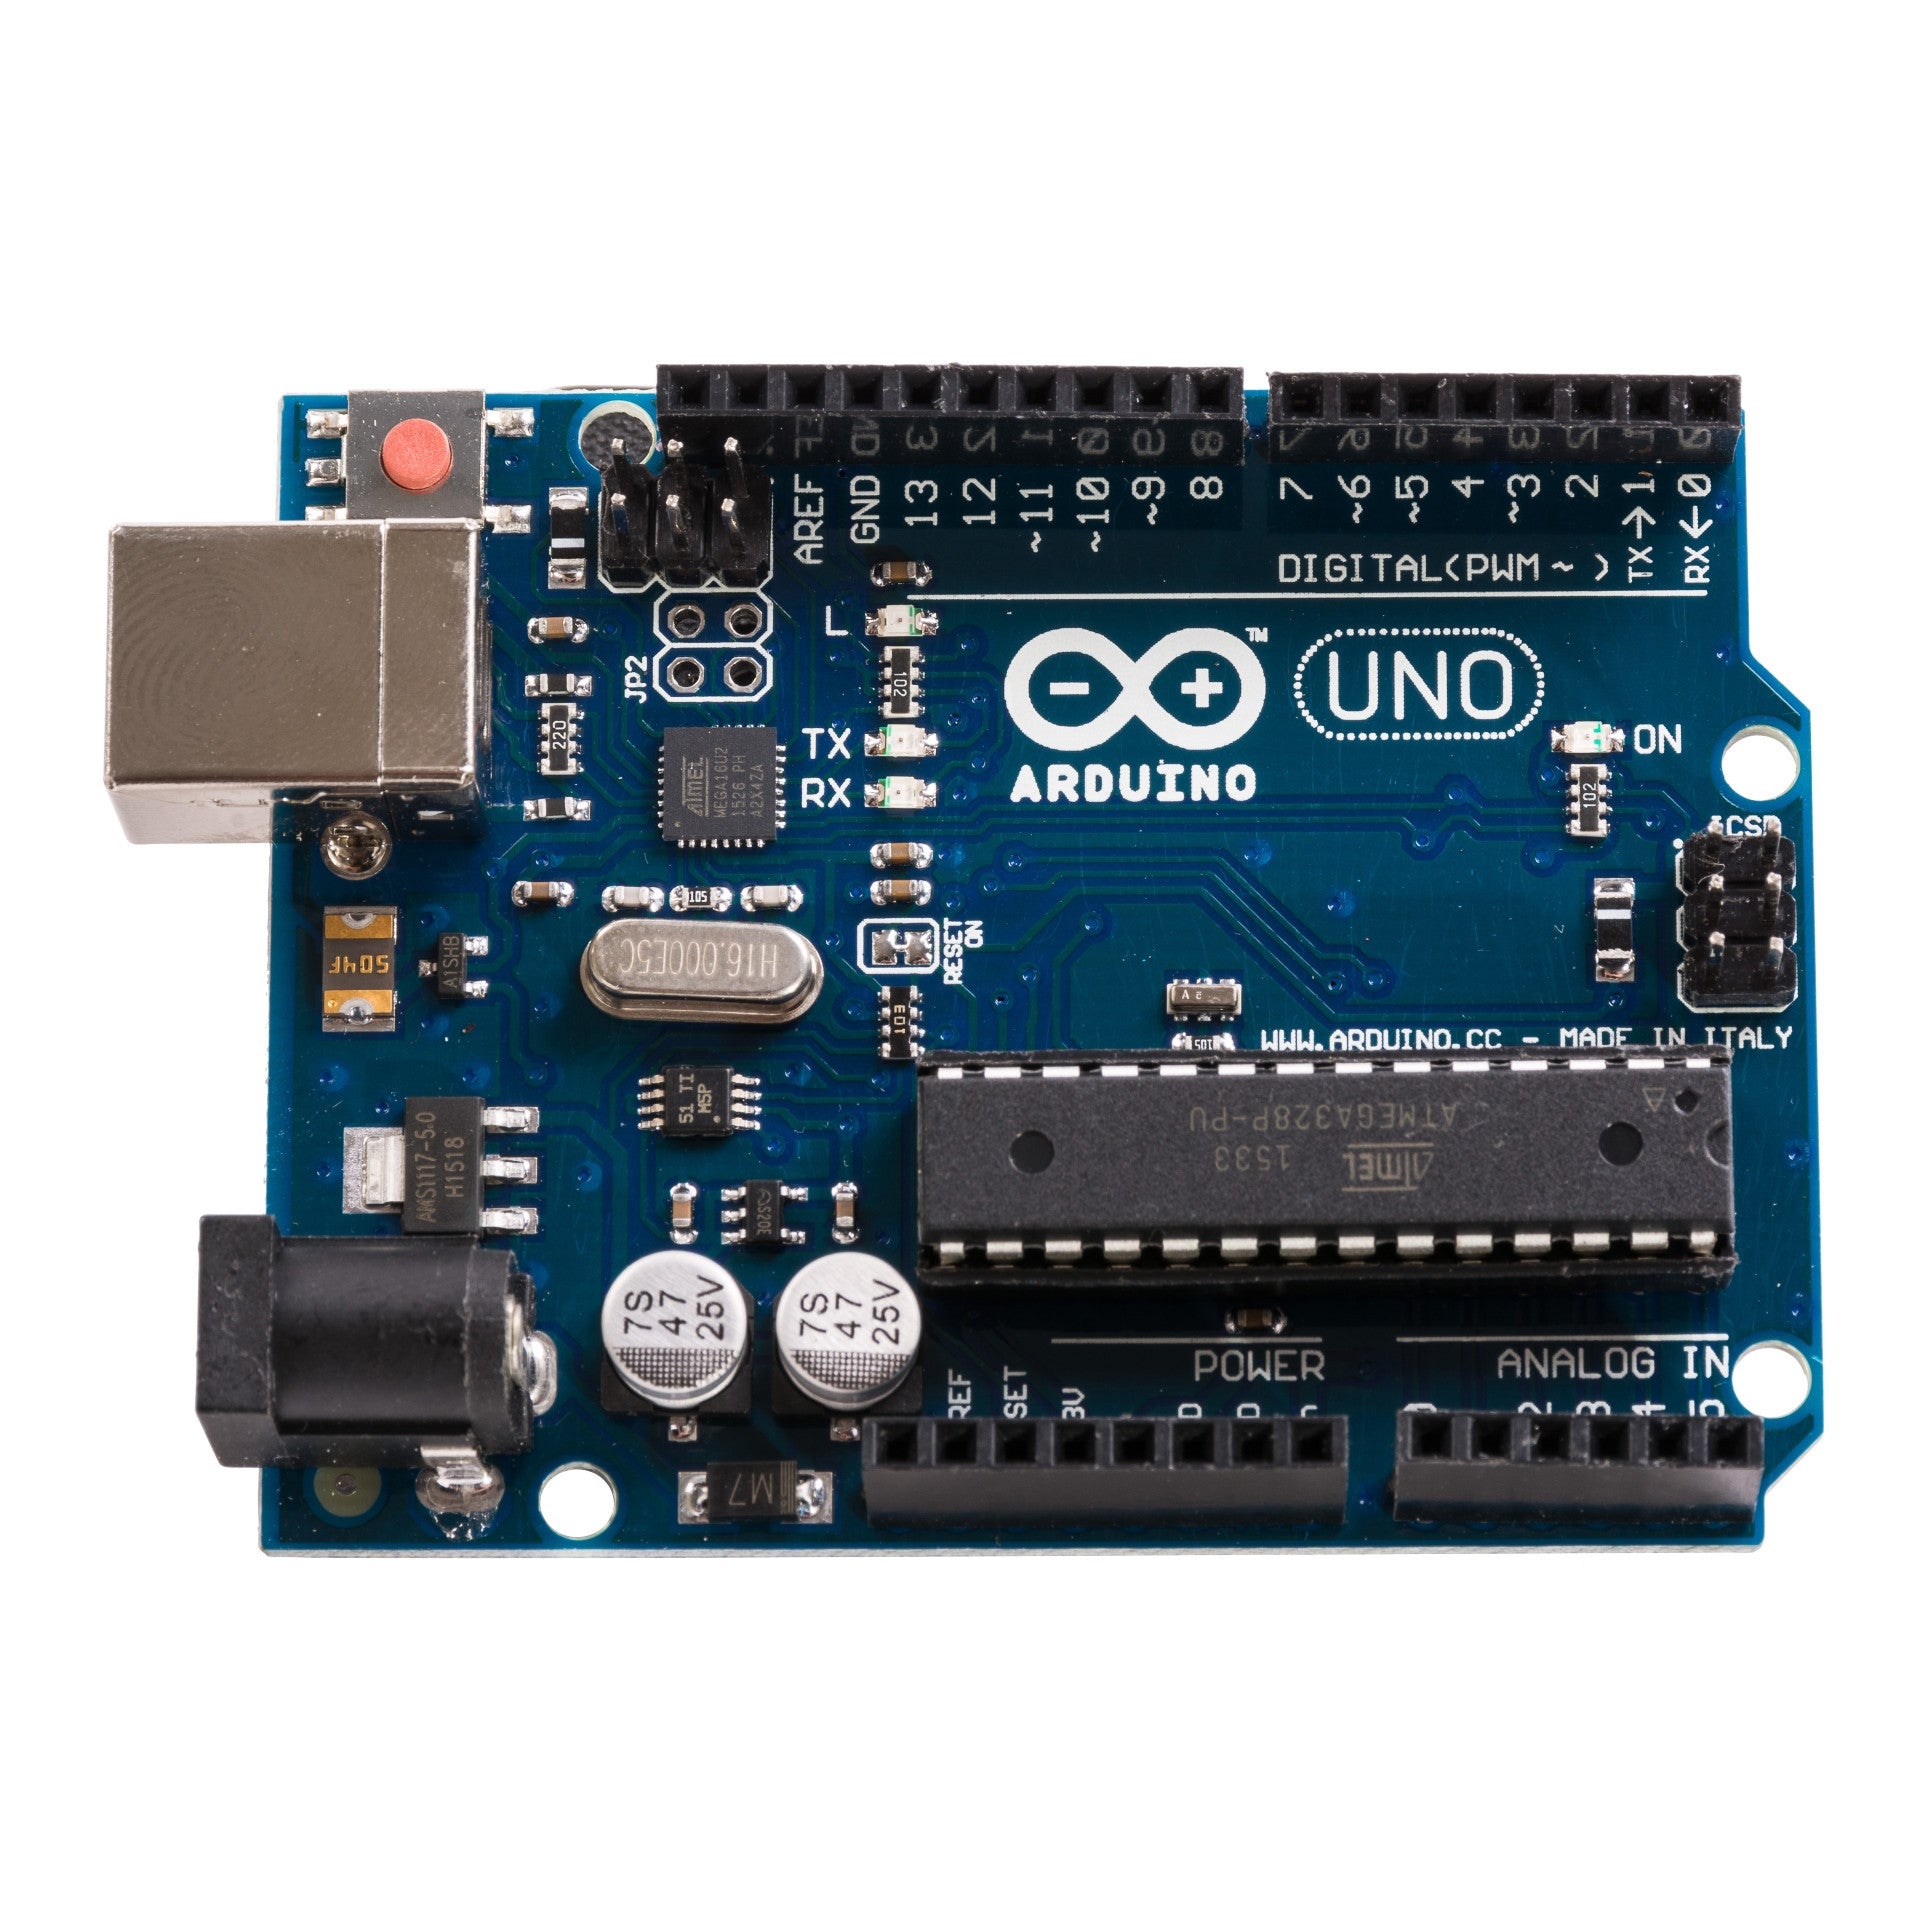
The Arduino is a development board that makes working with these little brains super friendly. You get:
- A microcontroller chip (like the ATmega328P on the Arduino Uno)
- Power regulation
- A USB connector for programming
- Useful pin headers to plug stuff into (LEDs, buttons, sensors, buzzers—you name it)
🛠️ Why Arduino Rocks (Especially for Beginners)
Arduino made embedded programming accessible. Here's what sets it apart:
- Simple IDE: Write code, hit upload, and see your project come to life.
- Huge community: Tutorials, forums, example projects—if you can Google it, someone’s probably already built it.
- Plug-and-play hardware: Most sensors and modules just work. Hook them up, use a library, done.
⚡️ The First Spark: Blink
Let’s be honest: the first thing everyone builds is an LED that blinks. And it's oddly satisfying.
void setup() {
  pinMode(13, OUTPUT);
}
void loop() {
  digitalWrite(13, HIGH);
  delay(1000);
  digitalWrite(13, LOW);
  delay(1000);
}
🔌 What Can You Do With It?
- Home automation
- Robotics
- Wearables
- IoT
🧩 The Building Blocks
- Digital vs Analog
- PWM
- Serial Communication
- Libraries
🛣️ Where This Path Leads
- ESP32/ESP8266
- Raspberry Pi
- Custom PCBs
🎯 Final Thoughts
Starting with Arduino is like opening the door to an invisible world...
🔆 Blink LED: Your First Digital Superpower
What if I told you this tiny piece of code is where empires of electronics begin?
The Blink sketch is your "Hello, World!" for hardware. It’s your first handshake with a microcontroller—your first command—and watching an LED blink by your own code is like watching fire spark from stone.
🚦 What's Really Happening?
You’re telling your microcontroller to send HIGH and LOW signals (i.e., 5V or 0V) to a pin. When that pin is connected to an LED, it lights up.
void setup() {
  pinMode(13, OUTPUT); // Set digital pin 13 as an output
}

void loop() {
  digitalWrite(13, HIGH); // Turn the LED on
  delay(1000);            // Wait 1 second
  digitalWrite(13, LOW);  // Turn the LED off
  delay(1000);            // Wait 1 second
}
🧠 Microcontroller Basics in Disguise
- pinMode(): You're configuring a pin as OUTPUT — this sets up a one-way street for voltage.
- digitalWrite(): You flip the voltage on/off. That's digital logic: HIGH = 1, LOW = 0.
- delay(): You're telling the program to pause, giving your eyes time to see the blink.
🔌 Where You Can Go From Here
- ⏱ Make the LED blink faster or slower (change the
delay()) - 🌈 Use
analogWrite()with PWM to make it fade instead of blink - 🎛 Add a button to control the blink (introduce
digitalRead()) - 🌐 Make it blink via Wi-Fi using an ESP8266 or ESP32
- 📟 Build a heartbeat monitor — visualize sensor data through blinking!
🎯 Final Thoughts
This is more than a blinking light — it’s a milestone. You’re controlling electricity with logic. From here, you’re not just using technology — you’re building it.
Today it blinks. Tomorrow, it automates your home, flies your drone, or monitors a plant on Mars. Keep going.
ESP8266 content coming soon...
ESP32 content coming soon...
ESP32-CAM content coming soon...
Blinking an LED using GPIO
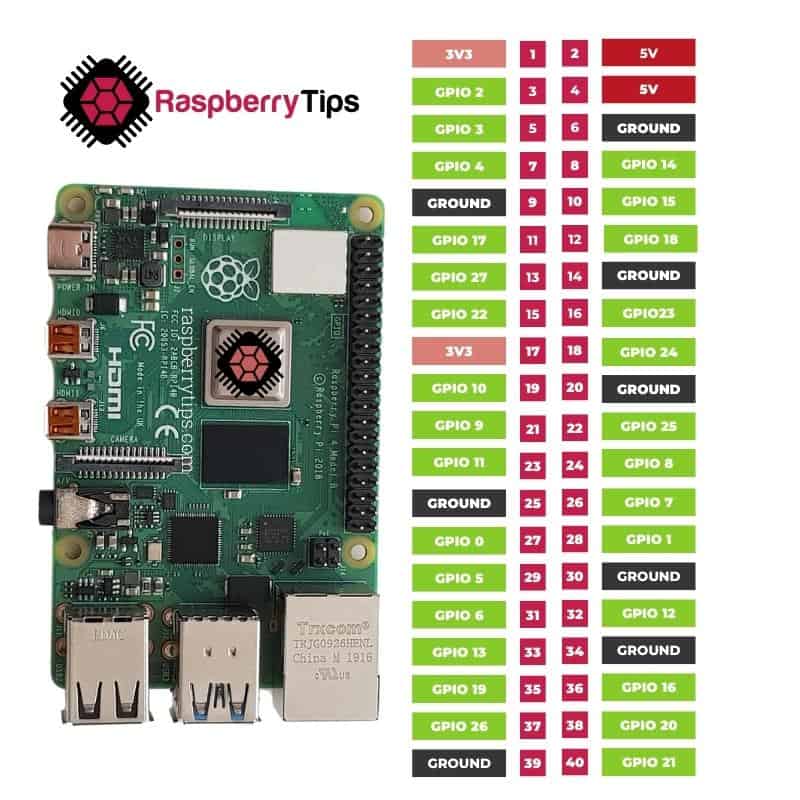
import RPi.GPIO as GPIO
import time

GPIO.setmode(GPIO.BCM)
GPIO.setup(17, GPIO.OUT)

try:
    while True:
        GPIO.output(17, GPIO.HIGH)  # LED on
        time.sleep(1)
        GPIO.output(17, GPIO.LOW)   # LED off
        time.sleep(1)
except KeyboardInterrupt:
GPIO.cleanup()Contact
Get in touch via email 'hamhacks@hotmail.com' or scan our QR code below!

Useful Links
Sites I use and trust.
Games
the OG of mobile gaming, i just cant get it to work on mobile yet! Snake in your browser!
This will blow your mind! Extreme Fun!!
Or a Scrap! FINISH HIM!!